The Basics of Water Damage Restoration

Water Damage Restoration Los Angeles requires an extensive list of tasks that can include drywall and ceiling repair, carpet or flooring replacement, repainting, and other similar projects. The water and materials can harbor bacteria and other toxins that promote mold growth, so they must be sanitized thoroughly.

Water Damage Restoration

Before professionals arrive, homeowners can do a few things to help mitigate the damage. Start by shutting off the water source, and ventilating the area to reduce mildew and mold.

Before a professional water restoration contractor starts any work, they should perform a complete inspection of the affected areas. This will help them determine the source of the water and categorize it according to its level of contamination. It will also allow them to assess the structural integrity of the building and identify any potential safety hazards or health concerns.

After identifying the source of the water and its level of contamination, they will begin the process of water extraction. This will involve using specialized equipment to remove the excess water and to drain water-logged areas of the property. They will also use moisture meters to check for hidden pockets of saturation that may need extra attention.

Once the excess water has been removed, they will focus on drying the space and preventing mold growth. They will use industrial-grade air movers and dehumidifiers to speed up the drying process, as well as monitor moisture levels in hard-to-reach areas. They will also use sanitizing and deodorizing techniques to sanitize the area and remove any lingering bacteria or contaminants.

This step is important because the longer a space remains saturated with water, the greater the chance of secondary damage and mold growth. It is also crucial to identify any electrical hazards and ensure that all damaged materials are removed and disposed of safely.

It is a good idea to take photos of the areas affected by the water damage before starting any repairs or cleaning. This will help you prove the extent of the damage to your insurance company, if necessary. Additionally, it is a good idea to remove any valuable or personal items from the affected areas before beginning any inspections. This will prevent them from being accidentally ruined by water or dirt.

Extraction

Water extraction is a vital step that helps to prevent further damage and reduce the risk of mold growth. It involves using submersible pumps and industrial vacuums to remove excess water from the affected areas of a home or business. This step also ensures that contaminated materials, such as insulation and drywall, are removed and replaced.

Before beginning the water extraction process, it is important to make sure that all safety hazards are addressed. This includes shutting off electricity, especially if it has been exposed to standing water for more than 48 hours. In addition, it is important to check the contents of the home or office to determine if any items can be saved. This can include papers, photographs and other personal items that may be salvaged as long as they are cleaned and treated immediately.

Once the removal of excess water is completed, the restoration crew will begin to dry out the property. This is a time-consuming process that involves specialized equipment, such as air movers and dehumidifiers. It is important to ensure that all moisture is eliminated, as it can lead to critical structural damage and accelerate mold formation.

Once the property has been completely dried, it is important to sanitize the area to eliminate bacteria buildup and odors. This step can be done using Environmental Protection Agency-approved disinfection and sanitization solutions. These can be administered through foggers, which transform chemicals into a mist that effectively kills odor-causing bacteria. This is a very crucial step in the water damage restoration process, as it can help to reduce health risks associated with toxic mold and bacteria. It is also important to note that many homeowners’ and business owners’ insurance policies will cover the cost of professional water damage restoration services.

Drying

Once the bulk of the water is removed, it’s time to start drying the affected areas. This is done to prevent irreversible damage such as swelling of porous materials, shrinkage of some fabric materials, and rusting of metal accents. If left unchecked, these problems can cause serious structural damage and mold growth, both of which are expensive and difficult to correct.

The process begins with a thorough inspection of the property. This includes identifying and stopping the source of water, as well as checking for any secondary damages such as stains from sewage or mud. Once the source is stopped, a variety of equipment may be used to remove remaining water. This can include submersible pumps if the water level is high, wet/dry vacs if it’s low, or a mixture of both.

After all the water is removed, the space must be ventilated. This can be done by opening windows and doors as long as the weather permits. In some cases, removing baseboards and molding may also be necessary to permit adequate ventilation. The area must also be sanitized, and this might include steam cleaning or commercial sanitizing solutions.

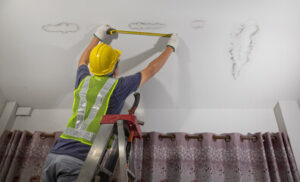
Once the space is dry, professionals can return to perform more detailed inspections and make decisions about what needs to be repaired or replaced. For example, if walls are severely damaged by water, they may need to be replaced entirely. Likewise, items such as furniture, carpeting, and draperies might need to be removed and stored away until they can be cleaned, dried, and restored. A professional water restoration company can help you recover from your water loss by restoring your property to its original condition.

Cleaning

After the water has been removed, it is necessary to clean and sanitize the affected areas. This will help to prevent mold and mildew from growing and may include using disinfectants, dehumidifiers, and fans. It is also recommended that homeowners open windows and doors to allow for air circulation.

The cleaning process can be very involved and requires specialized equipment and techniques. It is best left to professionals who have the equipment and experience to handle the task safely and effectively. The first step is to determine the source of the water damage and identify any potential safety hazards. This can be done by looking for signs of mold, such as discoloration or a musty smell.

It is also important to check for the type of water that has contaminated the area. There are three different types: clean, gray, and black. Clean water is from a source such as rain or leaky pipes. Gray water is contaminated from appliances such as toilets or washing machines. Black water is toxic and is from sewage or flooding. It is unsafe to touch and can contain harmful bacteria, viruses, and toxins.

Once the area has been cleaned and sanitized, it is necessary to dry out the affected areas. This can be done by opening windows and doors, using dehumidifiers and fans, and mopping up the excess moisture. It is also recommended that homeowners use paints that are designed to withstand moisture and drywall made from materials that can resist water damage.

If the water damage is severe, it is important to contact a professional service provider as soon as possible. This will help to prevent further damage to the home or building, and it can also save money on future repairs.

Repairs

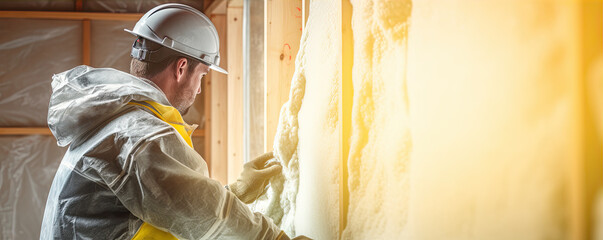
Once the water has been extracted and the area has been dried out, it is time to start repairing any damage. Flooring and walls may need to be replaced, possessions thrown away or stored elsewhere for safety, and structural elements like drywall or wood framing may need to be fixed.

This step is very important to prevent the growth of bacteria, mold and fungus that can cause illness in people and pets. Wet materials are breeding grounds for these organisms, and they can also lead to the deterioration of wooden structures and metal fixtures over time. If not taken care of immediately, they can become more serious problems that require expensive repairs and replacements in the future.

At this point in the process, a professional water damage restoration company should be able to provide you with a detailed estimate for any work needed and give you an estimated timeline for when the work will be completed. Depending on the amount of water damage, it may be necessary to temporarily relocate people and animals from the affected area while the work is being done. In many cases, homeowners can continue to live in their homes during the water damage repair and restoration process as long as they have access to another room or bathroom.

Water Damage Restoration is a complex task that requires training, equipment and experience to perform properly. If you’ve experienced a flood, water leak or other water catastrophe, call the water damage restoration experts at COIT to help restore your home, business or industrial facility back to its original condition. With over 70 years in the cleaning and restoration industry, our professionals are trained to remove excess water, dry and dehumidify the space, clean and disinfect surfaces, and perform any other necessary repairs for safe, fast and effective water damage restoration.

The Challenges of Insulation Removal

insulation

Perth Insulation Removal is the process of removing old insulation from an attic or other space, often for the purpose of adding new insulation. This can be done by hand with rolled or batt insulation like fiberglass and cellulose, or with spray foam insulation.

The removal process should include a thorough inspection and repair of the attic space to ensure safety and to avoid issues such as moisture, pests, and structural damage.

Cellulose

Cellulose is made from recycled paper and is a green alternative to other insulation materials. It’s installed in either loose-fill or dense packed forms that are blown into attics and walls using a machine called a blower. It can also be sprayed wet behind drywall in new construction.

Blown cellulose is more energy-efficient than fiberglass insulation and can be used to correct a wide range of home problems. For example, it can help reduce air leaks and improve temperature control throughout the house. In addition, it can reduce the amount of moisture in your house and prevent mold growth. It can also help eliminate rodent infestations.

If you have a problem with rodents, it’s important to address the issue immediately, as they often hide in insulation and can cause significant damage to your property. A professional can inspect your home for signs of rodent activity, including droppings and scratching sounds, and recommend a solution.

While some homeowners try to remove blown cellulose on their own, it’s generally best left to the experts. Not only is it a messy job, but there’s a risk of damaging your home’s structure with improper removal techniques. This can lead to expensive repairs and renovations down the road.

A professional insulation contractor will use a special vacuum to remove the old insulation and dispose of it properly. The hose will be stationed in a safe location outside the insulated area, so the contractors don’t track dust and debris through your home.

In general, sprayed cellulose is better than dry blown cellulose in terms of its environmental impact. It’s installed at high density and doesn’t leave any voids that could allow moisture to penetrate the walls. It also reduces thermal short circuits and provides a more comfortable living environment. It can even help with noise reduction.

Additionally, cellulose is made from recycled material and therefore reduces the need for raw materials that would otherwise be wasted in landfills. It also fits into a circular economy, which aims to design waste and pollution out of economic systems, leading to natural ecosystems’ regeneration.

Fiberglass

Fiberglass insulation is a common choice for homeowners looking to increase their energy efficiency and reduce noise levels. The material is made from recycled materials and is one of the most environmentally-friendly insulators available. It comes in a variety of forms, including batts, rolls, and loose-fill, and can be easily installed in walls, attics, and ducts. Its fire resistance is also beneficial, as it poses very little risk of combusting and can reduce the likelihood of smoke damage.

Like cellulose, fiberglass is an airtight material that can create a tight seal and reduce the transfer of heat. However, it does not perform as well in damp spaces. It is therefore best placed in dry areas of the home, such as attics and wall cavities. While it is typically more durable than cellulose, it still requires careful handling to avoid dislodging particles into the air, which can cause irritation.

Before starting the removal process, you will need to make sure the area is clear of any furniture or other items that could get contaminated with debris and dust. It is also important to seal off the space, as this will prevent any fiberglass from getting into other areas of your home. Lastly, you will need to put on appropriate attire for the task, including long-sleeved clothing and gloves. You should also wear a face mask to avoid inhaling the fiberglass fibers.

When you’re ready to remove the old insulation, you can use a tool known as an insulation vacuum to help you clean the area. This can be purchased from many hardware stores and is a quick and effective method for removing old insulation. Once you’ve finished removing the insulation, you can dispose of it at your local recycling facility. Be sure to follow the facility’s preparation guidelines, as these can vary from location to location.

Another way to replace old insulation is by injecting a new type of material into the walls using a technique called injection foam insulation. This is a minimally invasive option that does not require any demolition or drywall removal and can be completed within a day. Contact RetroFoam today to find out more about this exciting and eco-friendly alternative!

Rock Wool

Rock wool, also known as mineral wool, is a type of insulation that is made from heated, naturally-occurring minerals. It has similar benefits to fiberglass insulation, but is more eco-friendly and durable. It can be used in both residential and commercial construction. Like other types of insulation, it can be installed in the walls, roofs, floors and other areas of a building to reduce energy costs. It also helps reduce noise transmission, which can create a more comfortable living environment for occupants.

While some people may consider rock wool to be more expensive than fiberglass insulation, it offers many advantages that make it an excellent choice for homeowners and businesses. For instance, it is more resistant to mold and mildew, making it a safer alternative for use in bathrooms and kitchens. It is also moisture-resistant, which can help prevent condensation that can damage the structure of a building. Additionally, it is very dense, meaning that it can effectively block sound waves, creating built-in acoustic insulation.

Another advantage of rock wool insulation is its ability to resist fire, which can be helpful in protecting a home or business from damage in the event of a disaster such as a hurricane. It is also more effective than fiberglass in blocking heat, preventing the loss of valuable energy.

Unlike other types of insulation, rock wool is made from natural materials and uses fewer chemicals than other products. It is also non-toxic, which makes it a good choice for homes with children or pets. It is also very durable, lasting for decades without losing its insulating properties. It is also moisture-resistant and vapor-permeable, allowing liquid water to drain away rather than soaking into the insulation or dampening surfaces underneath it.

Although the manufacturing process of fiberglass, rock and slag wool is criticized for producing asbestos, recent studies have shown no evidence that workers in this industry are at an increased risk of mesothelioma or other lung cancers. In addition, these studies have found that the mesothelioma mortality rate in glass wool and rock/slag wool subcohorts is lower than in the general population.

Spray Foam

Spray foam insulation is an effective way to fill gaps and voids in construction materials, making it a good choice for many homes. It has a unique structure that allows it to expand when sprayed, reaching all of the small nooks and crannies that might otherwise be difficult to insulate. This makes it an excellent option for hard-to-reach spaces, like under floorboards or in corners of the attic. Spray foam also tends to be more durable than other types of insulation, meaning that it will likely last longer and provide better energy efficiency.

The process of installing spray foam insulation usually starts with preparing the surface. This includes ensuring that the area is clean and free from dust, debris, or other contaminants that might affect its performance. The insulation crew will then spray the insulation in layers, usually beginning with a higher density layer before moving on to the lower density layer. Once the layer has been sprayed, it will be allowed to dry and cure before the next step.

Once the spray foam has fully cured, it can be removed using several different techniques. For example, a knife or other tool can be used to cut the insulation and pry it away from construction materials. This is typically a safe process, but it should be done carefully to avoid damaging underlying materials or electrical wires.

Alternatively, the spray foam can be dissolved with lacquer thinner. This is a common technique used by professionals, and it can be very effective at eliminating remaining insulation. However, this method can be very messy and may require a lot of patience.

Finally, the foam can also be scraped or chipped away with a hammer or other tool. Often, this will be the easiest method to remove the insulation, but it can be very time-consuming. It is important to keep in mind that removing spray foam insulation can be a complicated task, and it is often best to hire a professional to handle it. This will ensure that the work is done correctly and safely, and that any leftover chemicals are disposed of properly to avoid environmental harm.

Water Heaters – How to Choose the Right Water Heater for Your Needs

Denver Water Heaters account for up to 18% of your household energy use. Choosing the best type of water heater for your needs is an important consideration.

Water Heaters

Most homes use a tank-type heater that uses electricity or natural gas to heat the water. Natural gas is usually the most economical choice.

Water heaters consume a lot of energy, and the fossil fuels they use release greenhouse gases into the atmosphere. Fortunately, these days there are many alternatives to traditional fossil fuel-based water heating systems that offer greater performance, efficiency and longevity.

Energy-efficient models use a heat pump or direct solar system to heat the water, instead of relying on electric resistance heating elements. This technology reduces energy consumption by about half, saving you money and lowering emissions. In addition, new models have smart thermostats that automatically initiate heating during off-peak hours when electricity costs are lower.

Aside from the type of water heater used, your home’s insulation will make a big difference in energy savings. If your pipes are not well insulated, heat can get sucked out of them, forcing your water heater to spend even more energy reheating the same hot water. Having insulation installed throughout your home will help cut energy costs as well as improve comfort.

The Department of Energy has proposed higher efficiency standards for residential water heaters that will save homeowners a significant amount of money on their energy bills. If the rules go through, most electric water heaters will see efficiency gains thanks to condensing technology, and most gas-fired tank and instantaneous (tankless) water heaters will achieve efficiency gains using a heat pump.

In addition to lowering your energy and water consumption, these new standards will also decrease carbon dioxide emissions by a substantial amount. The rules would raise efficiency standards for new electric water heaters to 95%, and gas-fired tanks and instantaneous or tankless water heaters would be required to use a condensing technology to achieve 90% efficiency.

The green building experts at Meadowlark can help you design and build the sustainable custom home of your dreams. Call today to schedule a free consultation. We are an approved energy provider for Major Energy and can connect you with natural gas and electricity plans that will suit your needs. You can find out which plan is right for your home by entering your zip code at our energy calculator.

Installation

Water heaters are a crucial component of our modern lives, heating incoming cold water to supply sink faucets and appliances with hot water. The system also stores hot water for use at a later time. Whether you’re installing a new water heater or replacing your old one, the project requires a professional to ensure that the work meets all local building codes and standards for safety and efficiency.

A qualified plumber should be able to provide you with an accurate estimate for materials and labor for the project, though some material costs will vary. For example, the average installation for a gas or electric tank-style water heater will involve piping for the hot and cold water, as well as piping for the fuel source (if applicable). Other materials that may be required for unique installations include discharge pipes, pipe thread compound, pressure valves, solder, venting pipes and connectors, and a GFCI electrical outlet.

The installation process typically involves locating the water heater in an appropriate space. Most tanks are housed in a garage, basement or other suitable room that can be easily accessed. Then, a copper, iron or steel pipe is used to divert any effluent from the tank away from the floor. This pipe should extend within 6 inches of the floor, and in some locations, it might need to be extended outside the house to prevent flooding or damage.

If your home has an old water heater that needs replacement, it’s important to drain the existing unit before beginning the installation. To do this, attach a garden hose to the drain valve on the bottom of the tank and route the hose to a floor drain or run it outdoors. A plumber should then disconnect the hot and cold water pipes from the water heater, using a pipe wrench for compression or union fittings and a pipe cutter for straight metal tubing. It’s a good idea to use dielectric unions when connecting water lines, which will allow the connections to be disconnected without cutting or soldering in the future.

If your water heater is a natural gas model, it will likely require a special double-chambered vent pipe to carry exhaust gases outside the home. In some areas, building codes might also require a power fan to aid the flow of gases in this venting system.

Maintenance

A water heater is a large appliance that requires regular maintenance to prevent premature breakdowns and extend its lifespan. Some warning signs that your water heater may be in need of service include: clinking noises from the hot water tank, minor leaks around connections only, higher electric or gas bills than usual, not enough hot water to fill tub or shower and the pilot light continuously going out. By providing your customers with preventive maintenance tips, you can help them avoid expensive repair or replacement costs.

Flush the water heater regularly to remove sediments that build up in the tank. This helps prolong the life of your water heater and increases its efficiency. Most manufacturers recommend flushing a water heater at least once per year, and twice per year is even better.

Inspect the sacrificial anode rod for corrosion and determine if it needs to be replaced. Shut off the incoming water supply and the fuel source (if applicable) to the heater. Using the drain valve located near the bottom of the tank, close it and connect a garden hose to it. Open the drain valve and allow a few gallons of water to drain from the tank. Dispose of the draining water in a safe place, such as a nearby drainage pit or down an outside spigot. Remove the anode rod from its securing clamp and use a socket wrench to loosen the hex head if needed to pull the rod out for inspection. If the rod is corroded or has several inches of exposed core wire, it should be replaced.

Inspect and test the pressure relief valve (TPR) once per month. This is a safety device that opens automatically if the pressure inside the tank gets too high, protecting you and your home from potential damage. This valve has a toggle and an open piece of pipe that extends from it toward the floor. With the power off, open the valve and carefully lift the lever to release a little water. Observe the water color and temperature for any unusual changes. Once the pressure is back to normal, close the valve and check that the pilot light is lit if applicable.

Replacement

Hot running water is one of the most basic and essential utilities in the modern home. We use it for everything from showering and cooking to cleaning dishes and laundry. When a water heater fails, it’s inconvenient and often quite costly. Water heaters have a lifespan of about 10 years, so if yours is approaching that point it’s time to consider replacing it.

The most popular water heaters in North America are tank type units. These have a large insulated tank that keeps a reserve of hot water ready for use. They can be powered by electricity, natural gas, propane, heating oil, or solar energy. If you’re considering a new water heater, make sure it’s energy efficient. Energy utilities may offer rebates for certain models.

In addition to examining your current unit, check the first-hour rating (FHR) on its EnergyGuide label. This rating indicates how many gallons of hot water the unit can supply in an hour with a full tank. A higher FHR number is better for efficiency.

If you’re upgrading to a new water heater, be prepared to pay for additional materials and installation costs. These can include discharge pipes, fittings, pipe thread compound, pressure release valves, solder, venting piping, and water and gas piping. You may also need to frame and insulate a wall if you’re moving your water heater.

When you’re replacing a water heater, opt for the same model if possible to reduce the upfront cost of the installation. This can save you money on fuel and electricity, as long as the hookups are compatible.

If you’re installing a gas-powered unit, consider a high-efficiency condensing water heater. These funnel heated exhaust gases from your home’s furnace into a coil, where they heat the water in the storage tank. They operate more efficiently than standard gas water heaters, using about 60 percent less energy. These are best for homes that use primarily natural gas.